Baking in Autumn Vol. 1

I LOVE AUTUMN!  It's my very favorite time of year!  It's going by so fast, though.  I need to get my bake on.


I've spent my free time of the last month moving into the new house (yay!) or working on my seasonal hibernation tactics (also yay... for me anyway).  I haven't had a whole lot of time or resources to do much cooking, which is unfortunate for the goodies in my past two Full Circle orders.  It seems that over the last month I've accumulated an abundance of Bartlett pears.


There's a common theme in my house when it comes to the produce delivery; much is done in the ways of utilizing the fresh veggies.  Soups, roasts, stir-fry, all sorts of deliciousness has been experimented with, enjoyed, tinkered, etc.  But the fruit often goes by the wayside.  It's either eaten as it is or, as in the tragic case of last month's plums, it sadly spoils.  What a waste!


So with my time today I was bound and determined to utilize what limited dishes I have unpacked and put the too-soft-to-eat, too-good-to-trash Bartletts to good use, somehow.  I considered making the pear crisp that I shared last year in my Southern Comfort post, but that seemed too rich for today.  I looked up bread recipes, muffin recipes, all of which appealed to me but didn't seem to really hit the spot for sweet.  So I decided to make an amalgam of the baked goods I found to create my own Spiced Pear Bundt Cake.


My camera is still packed and I forgot that my new iPhone is fully functional in the needed capacity until I had already made the batter.


The batter will be lumpy, due to the grated pear, but I recommend mixing until just incorporated and then moving quickly to preserve all the leavening power you can from the wet baking soda and baking powder, much like when making muffins.


Another thing I'd like to recommend is to use some plastic wrap or foil to cover the hole in your Bundt pan before dumping your batter in there.  Otherwise you'll likely end up with a mess.  I speak from experience.  (Sometimes the obvious things don't strike you when they should.)  Remove the wrap before putting the pan in the oven though.  Again... some obvious things...


To finish up the cake, depending on how rich you want it, you can make a simple glaze with powdered sugar and milk or buttermilk, if you so desire.  I think it would also pair (I seriously just wrote "pear" and then had to backspace.  Where is my mind today?!) well with a French vanilla or burnt sugar frosting.  I chose to just dust the cake with powdered sugar.


The crumb is much like zucchini bread and the cake itself is just sweet enough, dense and moist.  Flecks of pear are hidden like little fruit gems and the spice gives enough bite to keep it interesting.  I think that it will make a nice, mild desert or a great breakfast with coffee.  I imagine later in the season I'll pair it with some eggnog...  Looking forward to that.


Spiced Pear Bundt Cake

3 cups all-purpose flour
1 teaspoon baking soda
1/4 teaspoon baking powder
1 teaspoon salt
1 tablespoon ground cinnamon
1 cup chopped walnuts (optional)
3/4 cup butter, softened, or 3/4 cup vegetable oil
3 eggs, lightly beaten
2 cups sugar
2 cups ripe pears (about 4); peeled and grated
2 teaspoons vanilla extract

Preheat oven to 350°F.  Lightly grease and flour a 10-inch Bundt pan
In a large bowl, combine the dry ingredients until well incorporated.  Set aside.
Peel and core pears (I use a melon baller to core them).   Grate  your pears into a medium sized bowl; a typical cheese grater size will do.  Stir in the rest of the wet ingredients, making sure everything is very well blended.  
Add the wet ingredients to the dry ingredients and stir until everything is moistened.  Then quickly transfer your batter into your prepared Bundt pan.
Bake for 1 hour, or until the cake is firm to the touch and a toothpick comes out clean.
Cool your cake for about 10 minutes on a wire rack, then turn it out of the pan using the two-wire-rack technique and cool it completely.  Once cool, transfer the cake to a serving platter and top it as you so desire.


Mac & Cheese: A Love Story

When life is insane, work is stressful, family is driving you crazy and your commute has become akin to a one-sided long term relationship, comfort food is in order. 

I know, I know, I've blogged about macaroni and cheese before.  But it's my favorite comfort food.  So I won't bore you with more drudgery, recipes etc.  But here's my latest batch...


I'm improving on my Mac skills and experimenting with noodle shapes, cheese types, fat content of milk, etc.  This one is a radiatore with Tillamook Vintage White Extra Sharp Cheddar, Monterrey Jack and a little Beecher's Flagship made with organic 2% milk.

If you have any M&C recipes to share, please do!  My kitchen door is always open...

Mambo Italiano!!!

I.  Love.  Italian food.  I don't know anyone who can honestly say they don't.  I also love vegetarian food.  I do know plenty of people who can honestly say they don't.  My goal is to change their minds with this; my favorite vegetarian lasagna recipe.


Isn't she gorgeous?  And not as complicated or time consuming as one would think.  Here are some tips:

  • Do not fear the roux.  If you've read my post about Macaroni & Deliciousness, then you will know I once feared the roux.  But it's easy and worth facing the phobia in order to get a good Béchamel.  And don't be afraid of the intimidating name; it's just white gravy. 
  • Don't make it too hard on yourself.  The zucchini and eggplant can be trick to slice correctly if you don't have a mandolin, and the whole marinating and grilling thing can be a deterrent to doing this at all if you're not in the mood.  I recommend Trader Joe's eggplant and zucchini mélange.  They sell it in the frozen food section, so make sure it's fully thawed before you use it.
  • Fresh pasta is best, but don't beat yourself up about it.  If you use dry lasagna, par-boil to a bit firmer than preferable to eat by itself.  Don't boil the hell out of it; the rest of the cooking will come in the oven.
  • What?  No tomato sauce?!  That's right.  Trust me on this one.  Try it at least once and if you really want some red, drippy, overly robust casserole thing, do it next time.
  • As always, make it your own.  Sometimes, when I'm feeling cheesy, I'll add some extra goat cheese or Fontina.  Sometimes I increase the amount of sauce, tinker with some extra nutmeg, toss in some sun-dried tomatoes or what have you.  I recommend against black olives in this one, despite how much I love them, but if that's your thing, that's your thing.

When all is said and done you should have a deliciously oozy, crispy on the top, melty in the middle, delightfully veggie laden plate of awesomeness.  Something like this...


Buon Appetito!


Fancy Pants Vegetarian Lasagna

Olive Oil (for brushing the pan)
2 eggplants, sliced
4 small zucchini, sliced
2 Tbsp butter
2 garlic cloves, finely chopped
1 Tbsp finely chopped Italian parsley (flat leaf)
1 Tbsp finely chopped Marjoram
1 Tbsp finely chopped Oregano
2 Tbsp chiffonade Basil
10 oz shredded Mozzarella (Sometimes I will substitute with a bag of good "Italian Blend" pre-shred)
1 pint (about 2.5 cups) strained canned tomatoes (S&W usually, or San Marzano if I remember to buy fancy pants tomatoes)
1 box no-precook lasagna (if you can't find it, par-boil regular lasagna until bendable but not fully cooked)
1 pint Béchamel sauce (recipe below)
4 oz freshly grated Parmesan
Salt & Pepper

Preheat oven to 400F. Brush a large ovenproof dish w/olive oil.
Brush a large grill pan w/olive oil and heat until slightly smoking
Cook eggplant slices on grill and over medium heat for 8 minutes or until golden brown. Drain on paper towel if needed.
Melt butter in a skillet and add the garlic, zucchini and herbs. Cook over medium heat stirring frequently for 5 minutes or until the zucchini are golden brown all over. Remove from pan and drain of paper towels.

Layer the eggplant, zucchini, mozzarella, strained tomatoes, half of the béchamel sauce and lasagna in the ovenproof dish, seasoning with salt and pepper as you go. Final layer should be lasagna.
Pour remaining béchamel sauce over everything, making sure all the pasta is covered.
Sprinkle with the Parmesan cheese and bake in preheated oven for 30-40 minutes or until golden brown.

Béchamel Sauce
1/2 stick butter (2 oz)
1/4 cup flour (2 oz)
2 cups whole milk
1 bay leaf
salt and pepper
freshly grated nutmeg (optional)

Melt butter, add flour and cook over low heat, stirring constantly for 1 minute
Remove the pan from heat and gradually stir in milk
Return the pan to the heat and bring to a boil, stirring constantly until thickened and smooth.
Add the bay leaf and let simmer gently for 2 minutes.
Remove the bay leaf and season to taste with salt, pepper and nutmeg


A Side Note...

Damn, it's been a cold summer... Just recently has the sun decided to perch for a few days in a row.  So I've been trying to frequent as many farmer's markets as possible in these dwindling days of summer in search of vegetation.  There's nothing better than eating locally and in season, something which I've just learned a new term for! 

"Scorpacciata!"

I'm in love with the idea already.  Here's a little something to chew on...


"...understanding that it's about deliciousness, not just the slavish attention to somebody else's rules to eating something local..."

And if you're in the area, take advantage of what is being offered nearby while you can!  Washington is such a glorious state to eat in come Indian Summer...

A Real Quickie...

I'm looking for some real feedback here, so please, share your comments!  I'm searching for a new great breakfast idea.  Well, new to me, hopefully tried and true to you.

I heard of a fantastic sounding breakfast casserole from a friend yesterday, and I'm looking forward to trying it out on my next breakfast splurge as opposed to my typical poached eggs with green onions over toast.  So if you have any other ideas to share, please do!!!

Anyway, thanks in advance...

Following the Rules

A few months ago I picked up a little Italian cookbook from a clearance table for a couple bucks.  Somehow it ended up hidden away in my closet, not to be found until last week.  Hooray!


Each recipe has an illustration and the instructions are written simply; both good ways for a cookbook to keep my attention.  I love cookbooks, but when things get too wordy or I have no idea what something is supposed to look like I tend to lose interest quickly and use a recipe as inspiration for my own creation.  So it's been a good exercise and challenge to flip through my little clearance book and follow the rules.

The first thing I made was a Genoese Vegetable Soup.  I had a big bunch of fresh yellow and green beans and some green and gold zucchinis on hand from a friend's garden and their expiration dates were a good motivator to find a recipe that would used both.  They happily accompanied a plethora of other fresh veggies which took some prep time but would end up being worth the while.


My only regret in terms of veggies is that I was unable to find fresh peas anywhere.  Too late in the season, I suppose, but the softer canned peas added some body to the hearty soup.

After my veggie prep was complete I dumped everything into my big soup pot and added some extra virgin olive oil followed by some Swanson broth. 


The recipe calls for vegetable stock, but I have been hard pressed to find a good veggie stock or broth that I enjoy.  If you have any recommendations, please post.  I used half chicken and half beef broth.  It took away the vegetarian aspect of the soup, unfortunately, but it was still delicious.


The other workaround I used was to avoid making my own pesto.  Did I mention this soup has pesto?  Divine,  no? Anyway, I really wasn't in the mood for more prep and cleaning up the food processor (I don't have a mortar and pestle... hint hint, Christmas is coming...) so I chose ready made Buitoni Pesto with Basil.  It's not bad for store bought and usually tastes pretty fresh; I was pleased.  I'll definitely make my own next time, though...

The soup cooked for a long time which made it very thick and deadened a lot of the color.  I was concerned that there wouldn't be enough liquid to cook the pasta at the end, but no worries.  I chose  Barilla Piccolinoi Mini Farfalle which didn't soak up too much liquid and cooked in about 6 minutes.


After adding the pesto and allowing the soup to sit for a few minutes we scooped up hearty bowlfuls and topped with shredded Parmesan.  Served alongside some warm, crusty Pugilese bread it made a great, hearty meal and was FULL of flavor.  It didn't make the prettiest picture, but made up for it's lacking photogenic quality in deliciousness and frugality.


So here you go, please visit your nearest Farmer's Market and take advantage of the late season bounty before we're in full-fledged fall!

GENOESE VEGETABLE SOUP
There are many different recipes available for this soup, it looks like everyone goes by the veggies they like and are in season, but this is the one I used out of my clearance cookbook.

Ingredients for Soup

2 onions, sliced
2 carrots, diced
2 celery stalks, sliced
2 potatoes, diced
4 oz. green beans, cut into 1 inch lengths
4 oz. peas
7 oz. fresh young spinach leaves, shredded
2 zucchini, diced
8 oz. plum tomatoes, peeled, seeded and diced
3 garlic cloves, sliced thinly
4 Tbsp extra virgin olive oil
8 cups vegetable stalk (I substituted 4 cups chicken broth and 4 cups beef broth)
salt and pepper
5 oz. dried soup pasta (I used mini farfalle)
1 recipe of Basil Pesto (see below; I substituted with ready-made basil pesto)
Freshly grated Parmesan cheese, to serve

Ingredients for Pesto
4 Tbsp fresh basil leaves
1 Tbsp pine nuts
1 garlic clove
1 oz. freshly grated Parmesan cheese (about 1/4 cup)
3 Tbsp extra virgin olive oil

Method
Put all veggies and garlic in a large, heavy-bottomed pan.  Pour in the olive oil and stock.  Bring to a boil over medium-low heat.  Reduce the heat and let simmer gently for about 90 minutes.

Meanwhile, prepare the pesto; put the basil, pine nuts and garlic into a mortar and pound to a paste with a pestle.  Transfer to a bowl and gradually work in the cheese with a wooden spoon, followed by the olive oil to make a thick, creamy sauce.  (You can also do this in a food processor by adding all ingredients except the olive oil and pulsing together to combine, then run on low speed while slowly adding the oil, but they don't tell you that...).  Cover with plastic wrap and refrigerate until needed

Season the soup to taste with salt and pepper and add the pasta.  Cook for an additional 8-10 minutes, until the pasta is tender but still firm to the bite.  The soup should be very thick.  Stir in half the pesto, remove the pan from the heat and set aside to rest for 4 minutes.  Taste and adjust the seasoning, adding more salt, pepper and pesto if necessary.  Any leftover pesto may be stored in a screw-top jar in the refrigerator for up to 2 weeks (or if you're like me, you'll just keep the other half of your pesto in the container it came in ;) ).

Ladle into warmed bowls and serve immediately.  Pass around the freshly grated Parmesan cheese separately (those are the words used in the recipe, I think they're weird, but don't skimp on the cheese!)

The Fabled Bruschetta

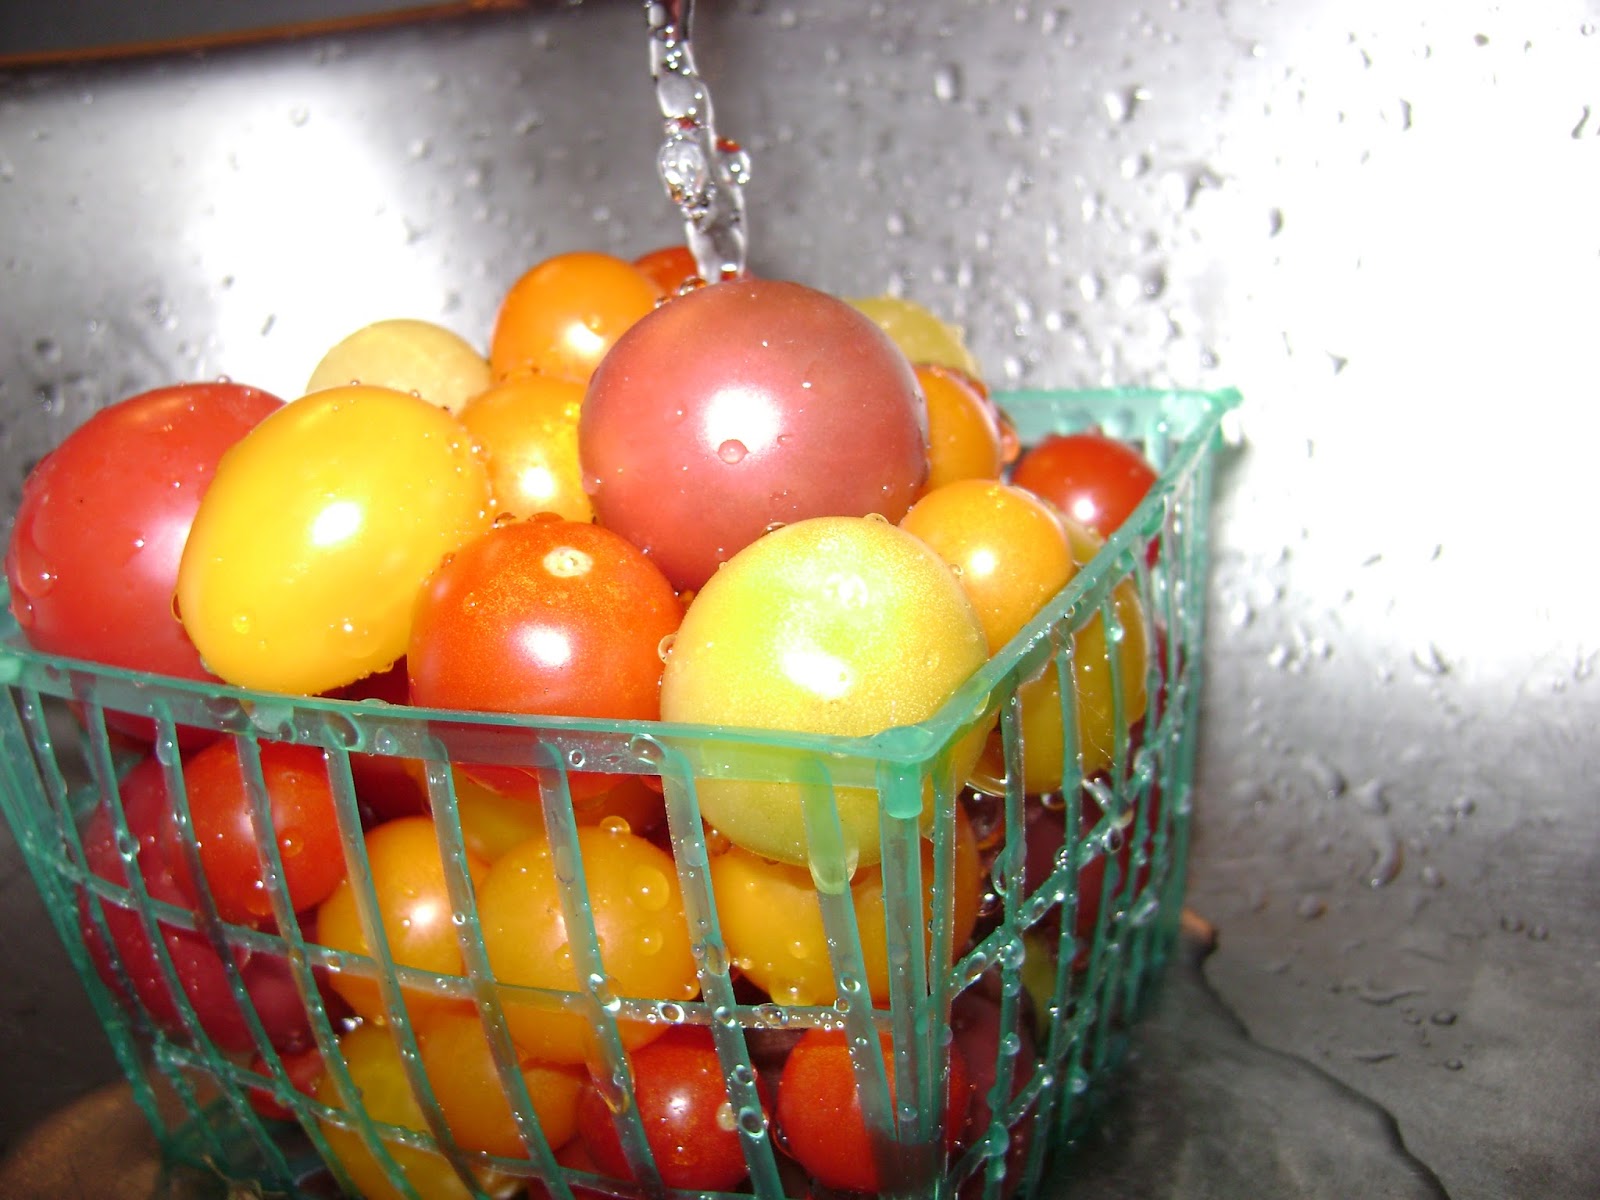
It's been awhile since I've posted, but I've been busy with new recipes!  Before I get to those posts, though, I just want to share the pics of the AWESOME bruschetta made with those tiny, beautiful heirloom tomatoes from the previous post.

First I did a rough chop to keep hearty pieces of tomato intact.

 
 Then I dressed the tomatoes with a chiffonade of basil, some extra virgin olive oil, kosher salt and black pepper.


It was hard not to eat it right then!  But I refrained.  I laid the sliced baguette on a wire rack over a cookie sheet and scooped my precious little jewels onto the bread...


...making sure to keep the edges clear of vegetation in order to ensure crispiness.


Then I topped the little beauties with a blend of Gouda, Mozzarella and Parmesan cheeses.  I also made a few pieces brushed with olive oil and topped with fresh thyme, basil and parsley and Parmesan cheese for a crispy base for some of the raw tomato mixture left over.  Here's an 'After' picture - I like the cheese to be gooey so it's lacking in typical golden deliciousness:


Yum!  Super simple supper for summer.  Don't forget to visit your local Farmer's Market.  If you're local to me, here's a good place to find one before they shut down for the winter.

Also...

I know I've already done a post about Bruschetta, but I had to share these tomato glamour shots!  They're going to be coarsely chopped and dressed with fresh basil and olive oil before adorning thin slices of baguette tomorrow...


And a landscape shot...


I seriously took, like, ten pictures of my little pint of heirloom minis, I love them so!  Thank you for the inspiration, Heidi!!!

Simple Things for Late Summer

It's September and starting to become more and more autumnal, despite the 80 degree freak weather we're having.  A perfect time to bid a fond farewell to summer and welcome the early fall.  I did so by enjoying our First Annual Welcome September Feast.


What you see here are the spoils of some lucrative cheese basket raiding from Metropolitan Market.  They have a pretty good cheese selection, but all their odds and ends from tastings and custom cutting end up individually wrapped and heaped into a big basket at the end of the refrigerator section.  Here you can find some glorious snippets for a dollar or two that will curb your craving and give you something new to try without committing to $14.99 a wedge.

Here are the selections chosen for the feasting: 

Tintern - a Welsh soft cheddar-like cheese with chives and shallots.  Very strong flavor, a known favorite of my household. 

Argentine Parma - A softer version of Parmesan from Argentina.  Not as crusty but still nice and salty. 

Mount Tam Triple Cream - An organic, creamy, earthy cheese from Cowgirl Creamery in Petaluma, CA. Good for brie lovers, not so good for noobs. 

Double Cream Gouda - From Holland, delicious, firm and creamy.  A nice break from the typical smoked Gouda, as this is sans smoke. 

Rollingstone Chèvre Cranberry Walnut Torta - I. Love. Goat cheese.  This you know from my post Cows Get All the Glory.  I try so hard not to be biased, but it was great; creamy, sweet and tangy with flecks of cranberry and little nubbins of walnut.  Yummeroo. 

Cornish Yarg - Come on, how can you pass up something called 'Cornish Yarg?!'  I had to buy it out of principle.  This one comes from the UK and is actually left to age wrapped in nettle leaves.  It was pretty mild, I was expecting more body and bite from something called 'Yarg,' but overall  it was pleasant. 

Raspberry BellaVitano - Surprisingly my favorite of the eve.  Kind of a cross between asiago and cheddar, but it's soaked in New Glarus Raspberry Tart Ale from Wisconsin to make it deliciously fruity. 

Gorgonzola - A tradish gorgonzola, nice and sweet but not a dolce. 

Circa 1926 Gouda - This was pretty amazing for a Gouda.  It's like finding out your lame cousin you see at Christmas, who sits around and talks about D&D, is a tap-dancing one-man-band on the weekends.  It was hard, but creamy, salty and sweet with a nice bite at the beginning and a smooth finish.  I was impressed.  Also, sans smoke.  This one is a Metropolitan Market exclusive from Beemster. 

Graskaas Limited Edition Cheese - Who doesn't love mystery cheese?  Plus the name reminded me of the Penny Arcade strip with Lord Skaas.  It was pretty delicious, mild and creamy.  Another one from Beemster made with the first milkings when the Beemster cows return to the fresh spring pastures after a winter without grazing. 

Point Reyes Original Blue - Another California cheese from Point Reyes Farmstead Cheese Company.  Has a nice bite but doesn't leave too much of that bleu cheese sting behind.  Not as sweet or mild as the Gorgonzola.

To round out our feast we had a couple of awesome loaves from Macrina Bakery; the Giuseppe and the Fresh Herb Baguette.  Crunchy outsides, tender, chewy insides.  Delectable.  It went well with balsamic vinegar and garlic infused olive oil with fresh basil.


Plus some roasted almonds, dried cranberries, some Whidbey Wildberry Chocolate Truffle bar and a a big ol' sliced peach.

 
All together a fantastic feast for all 5 senses, worthy of the season!  There was way too much to finish, obviously, but it should make for some tasty leftovers.


The simplicity of it all was probably one of the most delicious things about the meal; slicing a peach, chopping some basil, cutting some bread and unwrapping cheese.  Voila!  A beautiful celebration for the season, honoring some delicious food in the best way possible; by doing as little as possible to it.

For Lesley

Had to make a quick post for my cousin, who was one to partake in my baking escapades a few weeks ago.  I came home with a mammoth golden zucchini and made 6 loaves of bread; three with chocolate chips and three without.  I didn't think to take a picture, but here's one of my banana chocolate chip bread that looks pretty similar, just missing the gorgeous green and gold flecks of zucchini.


I usually top my banana bread with turbinado sugar and occasionally a shot of Malibu coconut rum, but I leave my zucchini bread plain on top.  However, when they're both done they're sweet and dense and studded with chocolatey goodness.

CHOCOLATE CHIP ZUCCHINI BREAD

 (Makes 3 loaves)
  • 4½ cups all-purpose flour
  • 3 tsp. ground cinnamon
  • 1½ tsp. baking soda
  • 3/4 tsp. baking powder
  • 3/4 tsp. salt
  • 3/4 tsp. nutmeg
  • 3 cup sugar
  • 3 cup finely shredded, unpeeled zucchini (One BIG one)
  • 3/4 cup cooking oil
  • 3 eggs
  • 1 bag chocolate chips
  • Grease bottom and sides of 3 loaf pans. I use the disposable ones for easy gifting.
  • In a medium mixing bowl, combine dry ingredients. Set aside.
  • In another medium mixing bowl, combine sugar, zucchini, oil, and eggs. Add dry mixture to zucchini mixture & stir until moistened. Fold in chocolate chips.
  • Spoon into pan and bake at 350 for 55-60 minutes until a toothpick comes out of the center clean. Cool on a wire rack for 10 minutes. Remove from pan and cool completely on rack.
Makes enough to keep one for yourself and feed two friends (or sisters!)

Enjoy!

Kick Out the Jams

Summer's abundance has visited my little apartment several times over so far this year, thanks the wonderful weather, a good, wet spring, and to Aunt Jackie and her green thumb.

Also, for the first time since I left California I saw people selling fruit on the side of the road this summer.


I bought these lovelies from a guy on the side of the road for $7.  Excellent deal in these parts, and only 3 were moldy!

The berries were my inspiration to try my hand at jam for the first time, yet another thing I've been afraid of.  I'm still not whole-hog on the idea of home canning, with all it's accoutrement, sterilizing and margin of error, but freezer jam seemed easy enough for a noob like me.

I bought some Sure-Jell pectin and followed the instructions, starting with cleaning and trimming my berries.


Next I mashed up my berries with a potato masher (jam should have fruit bits), added lemon juice, corn syrup and sugar and prepared the pectin.  It was super easy.


Isn't it pretty?  That was pretty much all there was to it.  I put it in some Ziploc containers to sit on the counter and set before freezing.


The squeeze bottle went into the freezer in the kitchen for easy access.  The three pint containers were split up into freezer safe glass jars and went into the deep freeze along with the single cup containers.  I figure the jars are for giving and the bowl are for keeping.

After a few days I tried it out.  It was a little soupy but super fresh tasting!  Not too sweet, definitely not too sour.  After another week in the freezer the squeeze bottle came out to adorn biscuits and it had set up quite a bit more.

The success of the strawberry inspired me to make some raspberry as well, with the berries my mom and I picked from my aunt's garden.  It started out a little more difficult since the instructions recommended to sieve half of the fruit (if desired) to remove raspberry seeds.  I decided half way through that I had a stronger desire to keep the seeds and not have to sieve than to go through the extra process and sacrifice a bunch of the pulp that went along with the seeds.  I like seedy jam, though, and it turned out pretty good.

With the raspberry I cut out the middle man of letting the jam rest before transferring to glass jars.  It didn't seem to make any difference in the long run in either the flavor or texture.


I will brave the heat canning sooner or later, it's about time to get out there and pick some blackberries and blueberries, if there are any left on the bushes.  We'll see how brave I feel once I get them home.

Southern Comfort

First off, I'd like to thank the closet gods that finally relinquished my camera cord; it's been missing for about 3 weeks.  I have no idea how it ended up in the closet, but I'm happy to have found it.

Anywho...

There's been a widespread hankerin' for some home cooking lately, so I feel compelled to submit.  The weather has been changing rapidly and autumn is making it's final descent into the great northwest.  Fried chicken is in order.

I've never been really interested in frying chicken on the bone; it always seems so intimidating!  I can whip out some chicken breast tenderloin strips like no other, but taking to task bone-in, skin-on chicken is daunting; the varying cooking times due to size, shape, body part (body part?!  Gross!) and the bone itself, not to mention the amount of time it sits in the oil and hence fear of burning, etc etc etc.  Cringe-worthy.

But we've entered the season of poultry and I was able to get three hind quarters with thigh and leg for $2.44.  We're in a recession, people.  I'll take what I can get.

Due to my innate fear of failure, I had to spend a little time researching how to fry chicken on the bone.  Here is what I've learned:

- Season your meat, don't just leave it up to the flour for the flavor.  I rubbed mine down with some Johnny's Seasoning Salt and Poultry Seasoning before any dredging occurred.  I prefer the Johnny's that includes MSG.  In case you don't remember from my Yankee Delights post, I am of the opinion that MSG really doesn't hurt you.

- Be liberal with the seasoning in the flour.  Because the crunchy crust should be delicious.  I went really basic with just Johnny's, I didn't want a lot of garlic or anything overpowering.  Also, I imagine dried herbs would burn in the long, hot frying process, so an aioli or dipping sauce on the side can be served it you want to 'fancy it up.'

- Give your dredged chicken some resting time to allow the flour to absorb some liquid from the skin and egg wash.  It will create an almost batter-like coating which will adhere to the chicken so you get crispy skin in each bite.  No slippery skin on your first bite, where it takes all the good crunchies off and then you're left with sad, naked chicken for the rest of dinner.

- Shortening makes a good frying fat, keeping in mind: 'Fry- life, mouthfeel, product appearance, specific product requirements, ease of handling and cost are the major criteria for selecting a frying fat for a given application.'  I learned this from an article from Oklahoma State University.  I'm telling you, I researched.  I used a mix of 2:1 regular vegetable shortening and Butter Flavored Crisco.

- Don't.  Be.  Afraid.

I seasoned my chicken, dipped it in an egg/milk wash and dredged it in seasoned flour.


I let it rest for about 10 minutes while I worked on some side dishes; corn on the cob, biscuits, mashed potatoes and gravy.  I will be the first to admit that while I put on my 'from scratch' gloves for the chicken and the biscuits, I used OreIda Steam 'n' Mash plain russets as my 'tatoes.  I'm convinced it's the most amazing product on the planet and they usually do a better job than I would, anyway.


A quick anecdote: I love corn season.  When I was growing up I spent a lot of time at my grandparent's farm in Selah.  In the late summer Grandma would walk us down to Al Calvert's; Al owned potato and corn fields.  We would get spuds and corn to bring back for dinner and we'd shuck it on the back porch and feed the husks to the neighbors horses.

Once in a while Al's wife would take us out to her pea patch in the middle of the corn field and we'd pick peas to bring home with our corn and potatoes.  They also had a creek that ran through their property that trout ran in and we'd go fishing.  My life was like a Country Time Lemonade commercial.  Good times.

Anyway, after the chicken rested and the shortening melted and was good and hot I put in the chicken and LEFT IT ALONE.


In the meantime I put together my biscuits.


Since the biscuits and potatoes only take 10 minutes to cook I got them going right after I flipped my chicken; it cooked for about 10-12 minutes on each side.  This had just about everything finishing at once, just the way I like it.  When the chicken was fully cooked, which I checked with my nifty digital meat thermometer, I let it rest and drain.  One important thing to remember is, if your oil is the right temperature (good and hot but not smoking) then your food won't absorb much oil and you aren't adding as much fat to your meal.


 I was pleased with how the chicken turned out, and of course I loved the biscuits!  I never pass up an opportunity to photograph my biscuits, because I love them.  I love making them, baking them and eating them.


Everything came together pretty well.  I would have liked to included something green, and I did make a cucumber salad with some beautiful cukes from my aunt's garden and a homemade creamy garlic dill dressing, but it was forgotten and left in the fridge.  Oh well, it will be a good lunch tomorrow.  The dinner was delicious, with some sweet tea and some freezer jam, which I'll post about soon.


For dessert, I went the quick-and-easy route with a fresh pear crisp.  Pears don't get a whole lot of glory compared to apples, but they deserve it!  The pears were fresh from my aunt's place as well (I picked them  up with some amazing peaches that ended up in crisp last week.  They were the most delicious peaches.  Ever.  The crisp went too fast to get a picture!)

The recipe was simple; just peel and thinly slice the pears, I used 7 medium-small ones.  Mix in a baking dish with a quarter cup each of white and brown sugar, cinnamon and nutmeg to taste (I use a lot), a teaspoon or two of vanilla, a dash of salt, 3 tablespoons of flour and a tablespoon of butter, dotted about the place.  Then top it off with some universal crisp topping (we usually double this recipe):

UNIVERSAL CRISP TOPPING (Courtesy of T.G. Nottingham and his mom)
1 cup sugar (sometimes I sub half with brown sugar)
3/4 cup flour
1/2 tsp. cinnamon
1/4 tsp. nutmeg (I'll sub both of these seasonings with a full tsp. of pumpkin pie spice when I'm in a pinch)
Dash salt
1/2 cup butter
Mix dry ingredients and cut in butter until mixture is coarse, pea-sized crumbs.

Bake at 350 until awesome (Usually 20-40 minutes, depending on the fruit, until gold and bubbly ).


It turned out rich and gooey and crispy and perfect for ice cream.  All in all it was a real homey meal that makes me want to cuddle up on the couch and watch Steel Magnolias.  A great way to take advantage of the weather change.

Calling All Cars...

Just a quickie - Does anyone have a good, tried and true recipe for lumpia?  I've had a craving lately...  Also, chicken and/or shrimp adobo?

Last week was Hawaiian week at Uwajimaya.  Love!  We had some Loco Moco (Hilo side, represent!!!).  My pic didn't turn out, but it looked almost exactly like this, only with green salad instead of mac salad.  I don't like mac salad.  Sorry.


I got my Hawaii fix, but didn't think far enough ahead to pick up stuff for a good Filipino meal.  So if you have a good recipe please, send it on over! 

The Kind U Find in a Second Hand Store...

I own one of these
It doesn't get a whole lot of use; it's usually packed in the back of the some god-forsaken cupboard, the bowl has to sit in the freezer for 24 hours before it's used, it takes up a lot of counter space and by the time I remember I have it I've usually already purchased ice cream.

But it's been hot.  And I've been craving sweet treats without the heaviness of milk and cream.  Therefore I submit for your consideration Sorbet!

Sorbet, as opposed to sherbet, is generally not a dairy based frozen treat and is typically fruit reliant.  My favorite sorbet in the world was Ben & Jerry's Purple Passion Fruit.  You can see it here in their flavor graveyard.  Boo.  I settle now for Berried Treasure, but it's an expensive fix.  I haven't found many other store-bought sorbets that I like.  If you have any to suggest, please do!

(Also, for more on Sorbet vs. Sherbet, check this out.)

So, Ben & Jerry make a premium product worth the premium price, this we know.  However, they also have a book of their premium recipes that, by the grace of the gods of frozen ambrosia, I found at a yard sale for under a dollar.  You can find it here on Amazon for a decent price.

I thought I'd take advantage; the furthest we've ever really delved into the literature in our household has been the sweet cream base recipes.  They're great for re-creating some former Baskin Robbins hits that have been sent to the Deep Freeze.  It helps to have some former scoop jockeys to recreate the flavors.

I checked out the seasonal fruit at H&L and decided on raspberries.  In my opinion it's still a little early in the season for bush berries here, but I thought I'd take a chance, they looked so vibrant!  I also picked up some Izze Sparkling Blackberry Juice, because why not?  I used my Ben & Jerry's cookbook as inspiration; here is my altered version of Raspberry Sorbet:

3/4 pound fresh raspberries
1 1/2 cups sugar
Juice of 1/2 lemon
1/4 cup light corn syrup
1 bottle sparkling blackberry juice

Combine berries, sugar and lemon juice.  Refrigerate covered at least 1 hour.
When ready to freeze, add corn syrup and sparkling juice and stir gently until blended.
Transfer the mixture to the ice cream maker and follow manufacturer's directions.

I'd like to add, ex post facto, that it helps to mash that sugar into the raspberries.  The ones I had were a little too sour and could have used some macerating.  Other than that, the sorbet was soft, light and smooth with a bright effervescence left on the tongue.  Also, it was a very pretty color and flecked with little ruby raspberry studs.


Refreshing, no?  I encourage you to go treasure hunting at a local second hand store for an ice cream maker, or even an ice cream ball and give it a try.  I have mine running right now, giving an encore performance with a couple cans of Hawaiian Sun.  Guava Strawberry Passion, anyone?  I'll let you know how it goes.

It's What's for Dinner

Steak is delicious.  Enough said.  When the Prime Rib Eye goes on sale at Costco, it's a happy day for all in the household.
When I get to sink my talons into a good piece of meat I like to do as little as possible to it in regards to flavor and cooking. 

With the newly sprung season we have rediscovered our outdoor grill.  Living in a apartment, there are rules about these things.  As much as the charcoal smell equates delicious picnic foods and the controlled fires of a gas grill conjures visions of flame-licked sweet and sticky chicken breasts, we must abide.  But it's not so bad, thanks to George Foreman.

I made a quick marinade with some brown sugar, apple cider vinegar, garlic, shallots and lime and let my steaks sit for about half an hour while I let the grill heat up and threw together a salad.  Then was grilling time.


Super easy.  8 minutes on each side, a quarter turn after 4 mintues to get good grill marks.  I threw the juiced lime skins on the grill, too, to get the last delicious bits of juice and pulp broken down.  I squeezed them over the steaks just before taking them off the grill to rest.

After the grilling was done and the meat rested for about 20 mintues under it's aluminum foil tent we dug in and enjoyed.  A little bit of hibachi sauce on the side and it was easy and awesome.


Hibachi Sauce

1-1/4 cup mayonnaise
1/4 cup water
1 teaspoon tomato paste
1 tablespoon melted butter
1/2 teaspoon garlic powder
1 teaspoon sugar
1/4 teaspoon paprika
dash cayenne pepper

Using a fork or a whisk, blend all ingredients together thoroughly until well mixed and the sauce is smooth. Refrigerate overnight to allow flavors to blend. Bring to room temperature before serving.